Finding Deep Relaxation and Inner Balance: A Tranquil Yin Yoga Sequence

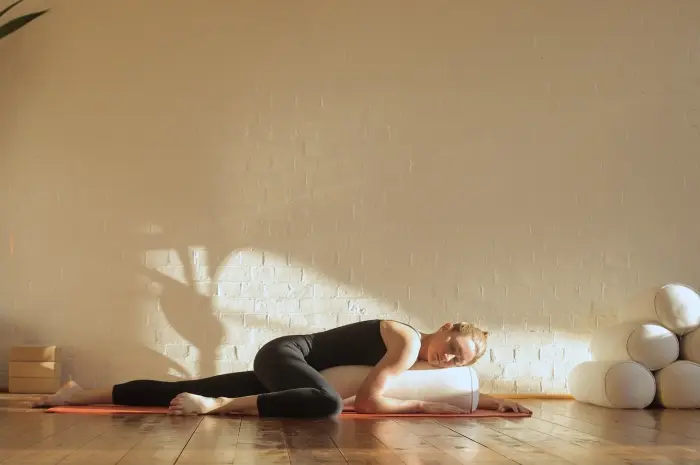
Yin Yoga, with its focus on long-held poses and deep stretching, offers a serene and meditative practice that nurtures the body, mind, and spirit. A well-designed Yin Yoga sequence allows practitioners to experience a sense of deep relaxation, release, and inner balance. In this article, we will guide you through a comprehensive Yin Yoga sequence that targets different areas of the body, encourages surrender, and promotes a state of tranquility.
Preparing for Your Yin Yoga Practice
Before you begin your Yin Yoga sequence, create a calm and comfortable space for your practice. Set aside dedicated time where you won’t be interrupted. Gather any props you may need, such as blankets, bolsters, or blocks, to support your body in the poses. Dress in comfortable clothing and remove any distractions. Remember to listen to your body and practice with mindfulness, respecting your individual needs and limitations.
Yin Yoga Sequence
1. Child’s Pose (Balasana)
Begin your practice with Child’s Pose, a restful pose that gently stretches the hips, thighs, and lower back. Slowly fold forward, extending your arms in front of you, and rest your forehead on the mat or a prop. Breathe deeply, surrendering into the pose, and allow any tension to release.
2. Butterfly Pose (Baddha Konasana)
From Child’s Pose, transition into Butterfly Pose to open the hips and stretch the inner thighs. Sit up, bring the soles of your feet together, and let your knees fall out to the sides. Gently fold forward, resting your hands on your feet or using props for support.
3. Dragon Pose (Low Lunge)
From Butterfly Pose, come into Dragon Pose to release tension in the hips and stretch the hip flexors. Step one foot forward into a low lunge position, ensuring the front knee is directly above the ankle. Lower the back knee to the ground and gently sink into the pose. Keep the front knee aligned and the foot grounded. Stay in this pose for a few minutes, allowing the hips to open and soften.
4. Supported Fish Pose
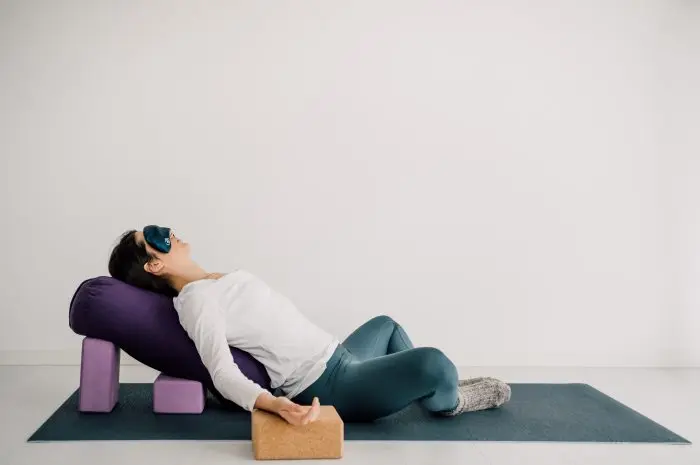
Transition from Dragon Pose to Supported Fish Pose for a gentle backbend that opens the chest and releases tension in the upper body. From the low lunge position, bring your back knee forward and lower both knees to the ground. Place a bolster or folded blankets behind you and lie back on the prop, allowing your head and chest to rest on the support. Open your arms to the sides and relax into the gentle backbend.
5. Sphinx Pose
From Supported Fish Pose, transition into Sphinx Pose, which further lengthens the spine and opens the chest. Slide off the bolster or blankets and come onto your forearms, placing them shoulder-width apart. Keep your elbows under your shoulders and gently lift your chest, while pressing your forearms into the mat.
6. Extended Puppy Pose
From Sphinx Pose, shift into Extended Puppy Pose to stretch the spine, shoulders, and upper back. Walk your hands forward, extending your arms while keeping your hips elevated. Rest your forehead on the mat or a prop, allowing your chest to sink toward the ground. Breathe deeply and surrender into the pose, feeling a gentle release in the upper body.
7. Supported Bridge Pose
Transition from Extended Puppy Pose to Supported Bridge Pose, a soothing backbend that stretches the spine, chest, and shoulders. Lie on your back and place a block or bolster under your sacrum (the bony area at the base of your spine). Allow your spine to rest on the prop and relax your arms by your sides. Close your eyes, breathe deeply, and surrender into the pose, feeling a gentle opening in the chest.
8. Twisted Roots
From Supported Bridge Pose, gently release the prop and come into Twisted Roots to stretch the spine and twist the torso. Bring your knees into your chest and let them fall to one side, allowing your hips and lower back to twist. Extend your arms out to the sides, keeping your shoulders grounded. Stay in this pose for a few minutes, then repeat on the other side.
9. Reclining Twist
Transition from Twisted Roots to Reclining Twist to further release tension in the spine and promote relaxation. Extend your legs out and bring one knee into your chest. Guide it across your body, using the opposite hand to gently press the knee down, while extending the other arm out to the side. Find a comfortable position and allow your body to relax into the twist. Stay in the pose for a few minutes, then repeat on the other side.
10. Legs-Up-the-Wall Pose (Viparita Karani)
Finish your Yin Yoga sequence with Legs-Up-the-Wall Pose, a deeply restorative pose that promotes relaxation and rejuvenation. Sit next to a wall and lie down on your side, bringing your buttocks as close to the wall as possible. Extend your legs up the wall, allowing your arms to rest by your sides. Close your eyes, breathe deeply, and surrender into the pose, feeling the gentle release and restoration in your body.
Closing and Integration
After completing your Yin Yoga sequence, take a few moments to rest in Savasana (Corpse Pose), allowing your body and mind to integrate the effects of the practice. Notice any sensations, thoughts, or emotions that arise, and cultivate a sense of gratitude for the practice and its benefits.
Conclusion
A well-designed Yin Yoga sequence provides a peaceful and transformative practice that nurtures the body, calms the mind, and restores inner balance. Incorporating the gentle and long-held poses in this sequence allows for deep stretching, release of tension, and a sense of surrender. Remember to practice with mindfulness, respecting your body’s limits and finding comfort and ease in each pose. Embrace the serenity and profound relaxation of Yin Yoga, and let it guide you on a journey of deep introspection, tranquility, and inner harmony.


